


The project topic is to calculate the distance between two locations using Google Maps API.
Basically, an API(Application Programming Interface) is a set of methods and tools that can be used for building software applications. Google Map API is an example of Open API. Open APIs are made public or external with minimal and customized restrictions. They require registration and use of an API key.
An API key is used to identify and authenticate . They also act as a unique identifier and provide a secret token for authentication purposes. API keys are used to identity and authorize projects.
The Google Maps API is one of those clever bits of Google technology that helps you take the power of Google Maps and put it directly on your own application. It lets you add desired content with provided methods.
Project Phases
Phase 1: Initiation and Planning
The software development project plan is one of the most important phases of software development. It influences the whole development process and the ways everything will be done.
For a start, the team had a project kickoff meeting on the 5th of June, 2022 at exactly 10:00am. The meeting was facilitated by the team leader.
The meeting addressed the project's goal, a comprehensive analysis of the project, an action plan including how decisions will be made, a communication plan and the next steps to take after the day's meeting. The team set priorities and ideas were generated. At the close of the meeting, the scope and work effort were specified, we had agreed on the feasibility of the project and tasks had been distributed.
Phase 2: Launch and Execution
Firstly, the team decided on a name for the new project because names have power and if chosen well, inspire and unify action and we all decided on 'LocateMe'. We designed the application logo and the application interface
As a team, the second step we took was getting an API key.
A Google Map API key is a personal code provided by Google to access Google Maps on this site. Your API key provides you with a free quota of Google Map queries. Your Google account will be automatically billed for any usage that exceeds your quota.
How the team generated an API key:
Google provides a series of API some of which are Maps JavaScript API (browser key), Directions API (browser key), Timezone API (browser key),Geocoding API (server key).
On the Google Cloud platform, we enabled the Directions API which is used to provide directions between two locations. We confirmed that billing was up-to-date, we hovered on APIs and services and then Credentials. We created a new project 'LocateMe' and created credentials, selected API key and the API key was displayed.
Setting up Flutter Project
- Created new Flutter project
flutter create locate_me - Added google_maps_flutter to
pubspec.yamlfile - Added dio to
pubspec.yamlfile. Dio helped us send HTTP requests to the Directions API. - Added flutter_polyline_points to
pubspec.yamlfile. Polyline points helped us show routes.
Android setup
- Navigated to the
AndroidManifest.xmlfile and added the code snippet in the application tag:
<meta-data android:name="com.google.android.geo.API_KEY"
               android:value="API KEY HERE"/>
- Enabled permissions to access user's location in the manifest tag:

iOS setup
- Navigated to
ios/Runner/AppDelegate.swiftfile and replaced the code with the code snippet below: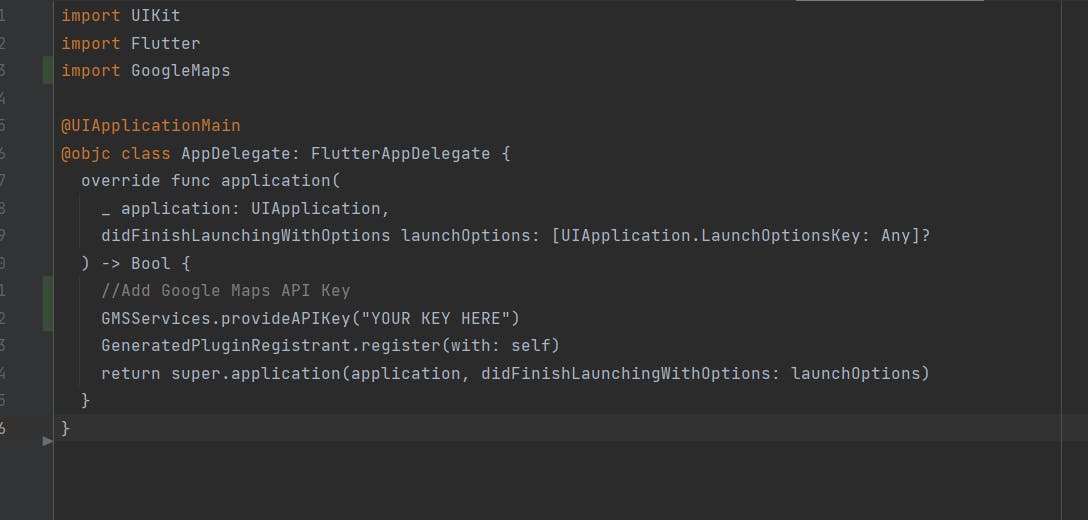
- Added the following code to
ios/Runner/Info.plistfile:

- Enabled permissions in iOS in the same file

The whole process completes setup for both platforms
Coding the Application
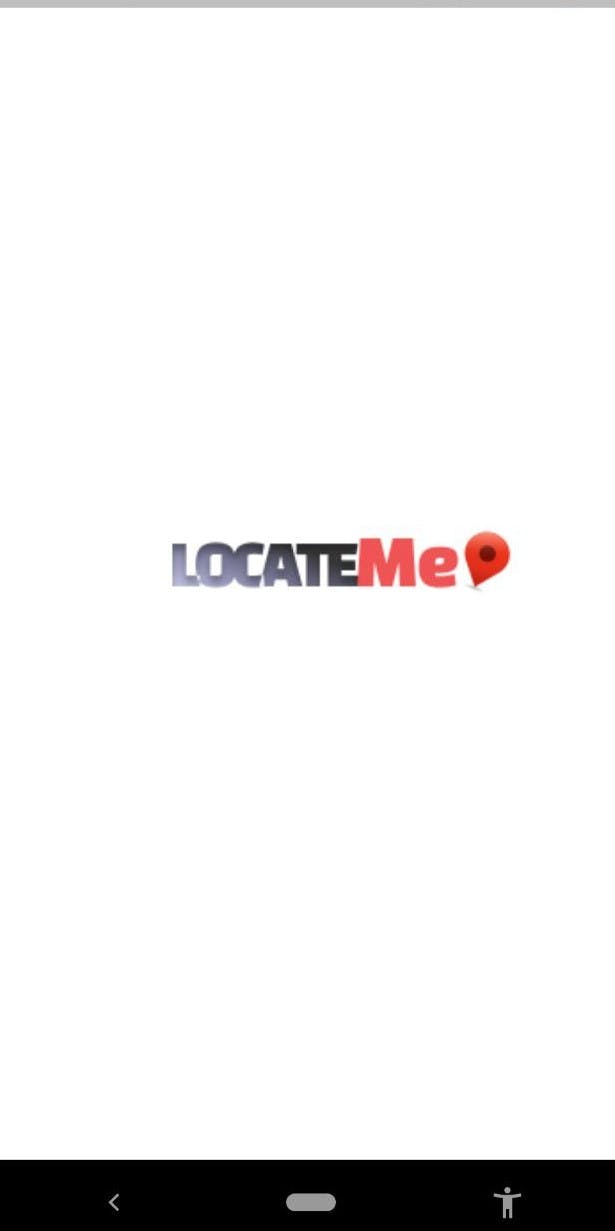
- Built the Splash Screen The Splash Screen displays the Application Logo alternatively referred to as the boot screen.
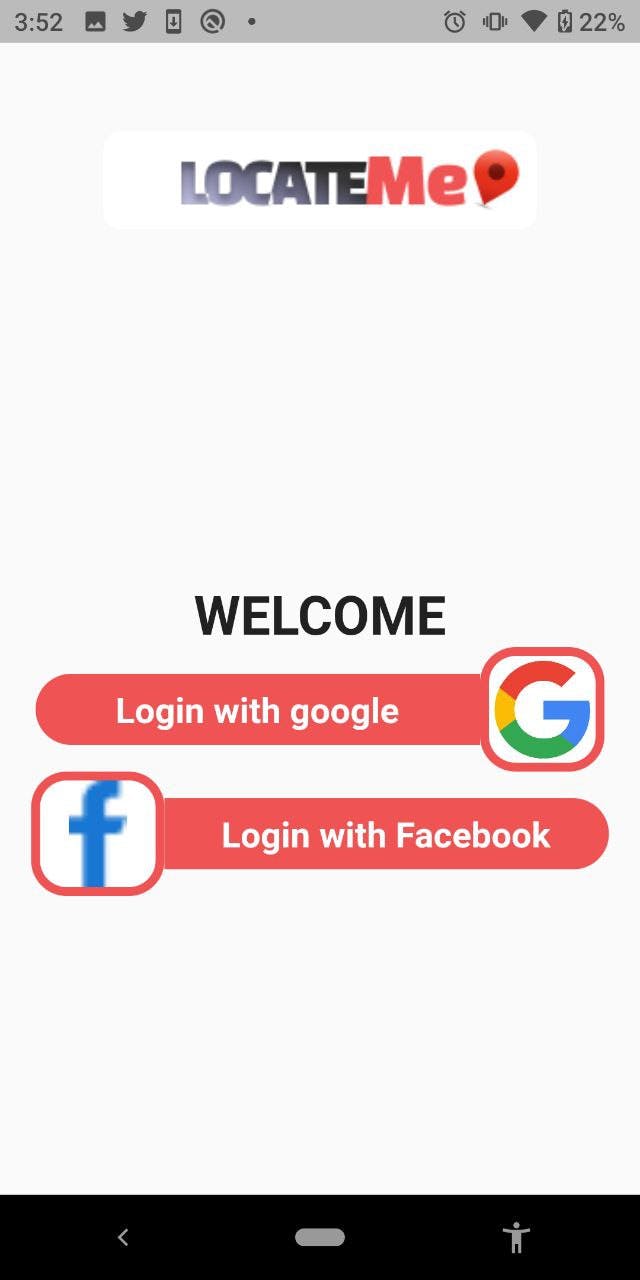
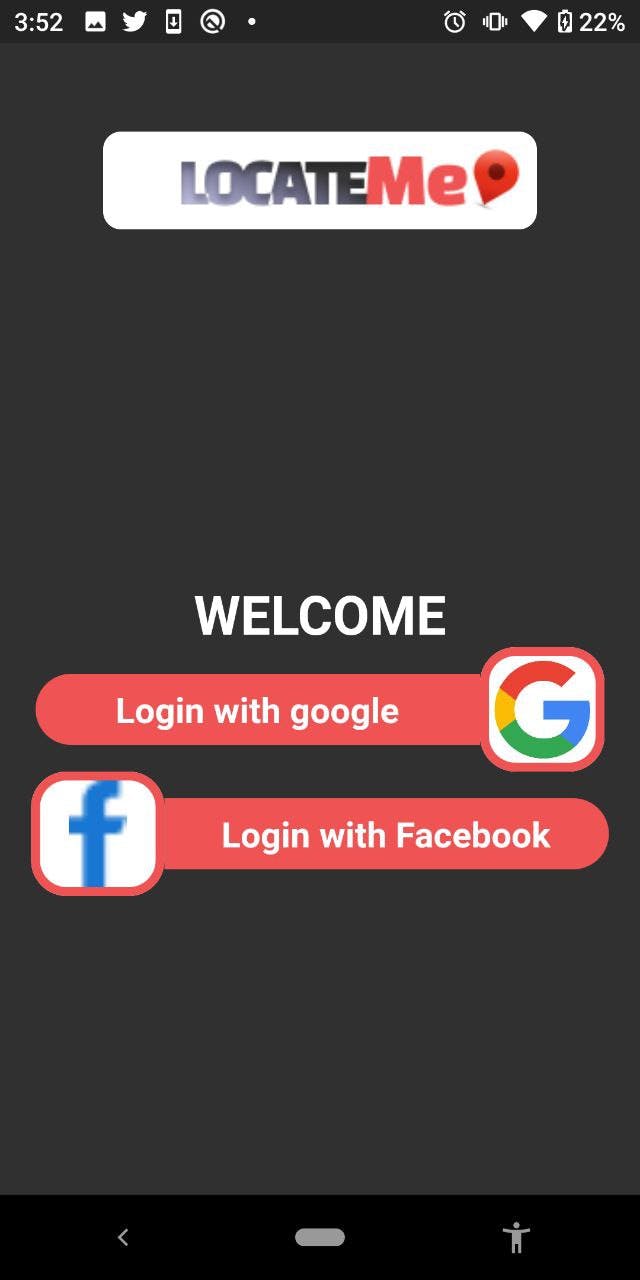
- Built the authentication Screen
The authentication screen allow users to Sign In with their Google or Facebook account.
Auth Screen in Light mode
Auth Screen in Dark mode
- Built the basic application structure, starting with the following code:
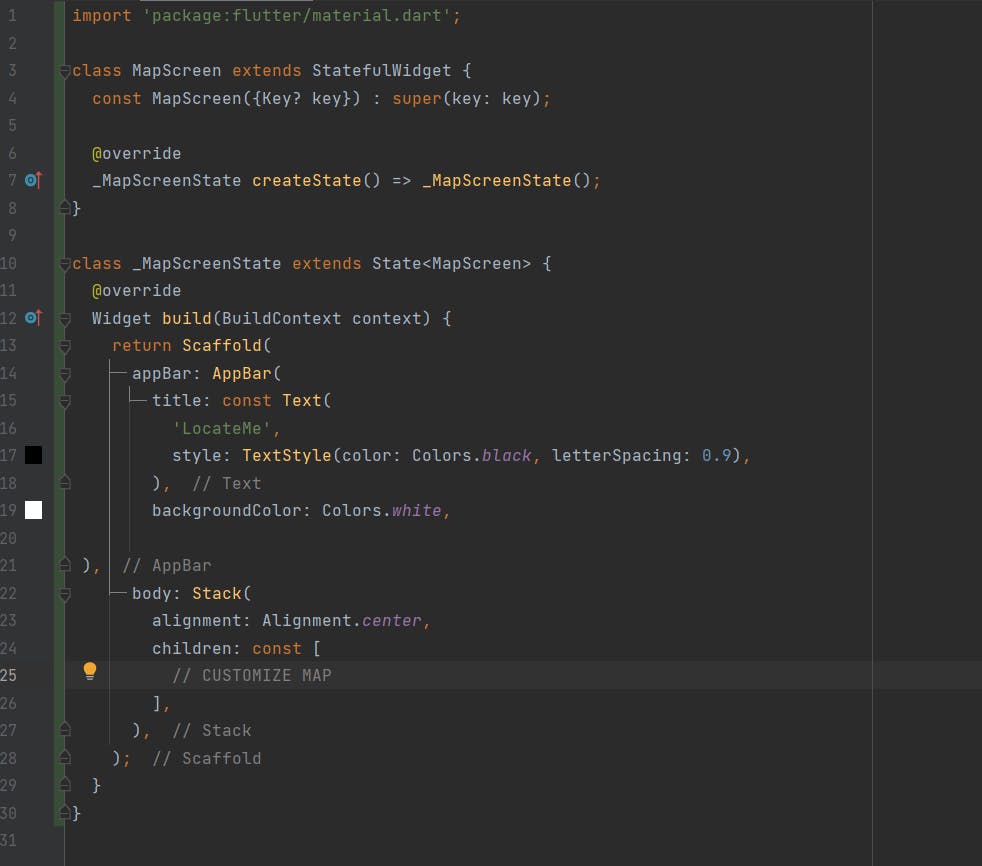
We set an App bar, housing the application title.
We used a Stack Widget to keep the Map and make a layer of widgets by putting Google Map and other widgets on top of each other.
- Customized Google Map by setting parameters.

- myLocationButtonEnabled: Button is used to display user's location in camera view
- zoomControlsEnabled: Displays zoom controls(a slider or + / - )in Android only
onMapCreated: The Callback listens to the Map for changes and is used to control the camera position of the Map view.
mapType: The hybrid map type shows the major streets on satellite
The code for the Floating Action Button at the bottom of the screen.
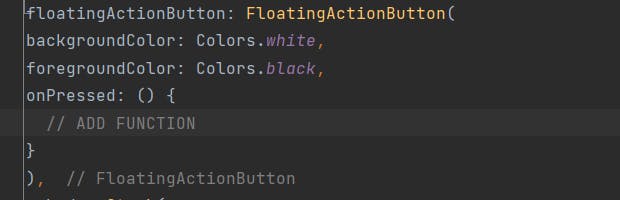
The onPressed function animates the Camera back it's original Position
- Set a TextButton to move to another Position
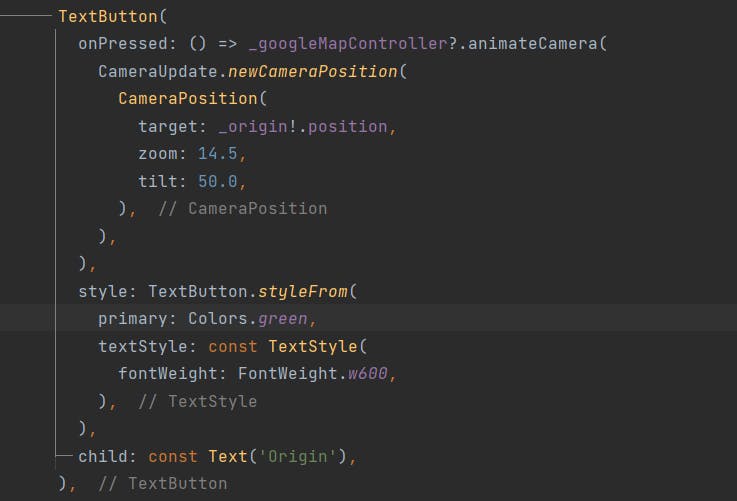
Here, we specified the target, zoom and tilt property of the CameraPosition widget. zoom is the zoom level of the camera, the max is usually 21, depending on the location.
- Set Map Markers
We added two markers which are displayed as null at first until user selects the marker positions

Google Map widget lets us specify the marker parameter that takes in a set of markers. Origin and Destination are both added to a list if they are not null.
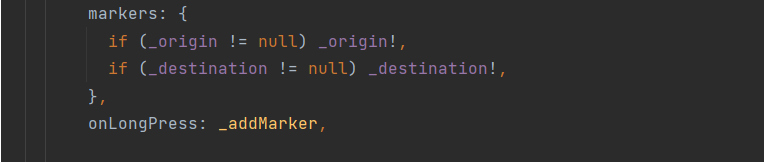
Google Map allows us to add onLongPress functionality which gives a LatLong Position.
We created a private method
_addMarker .
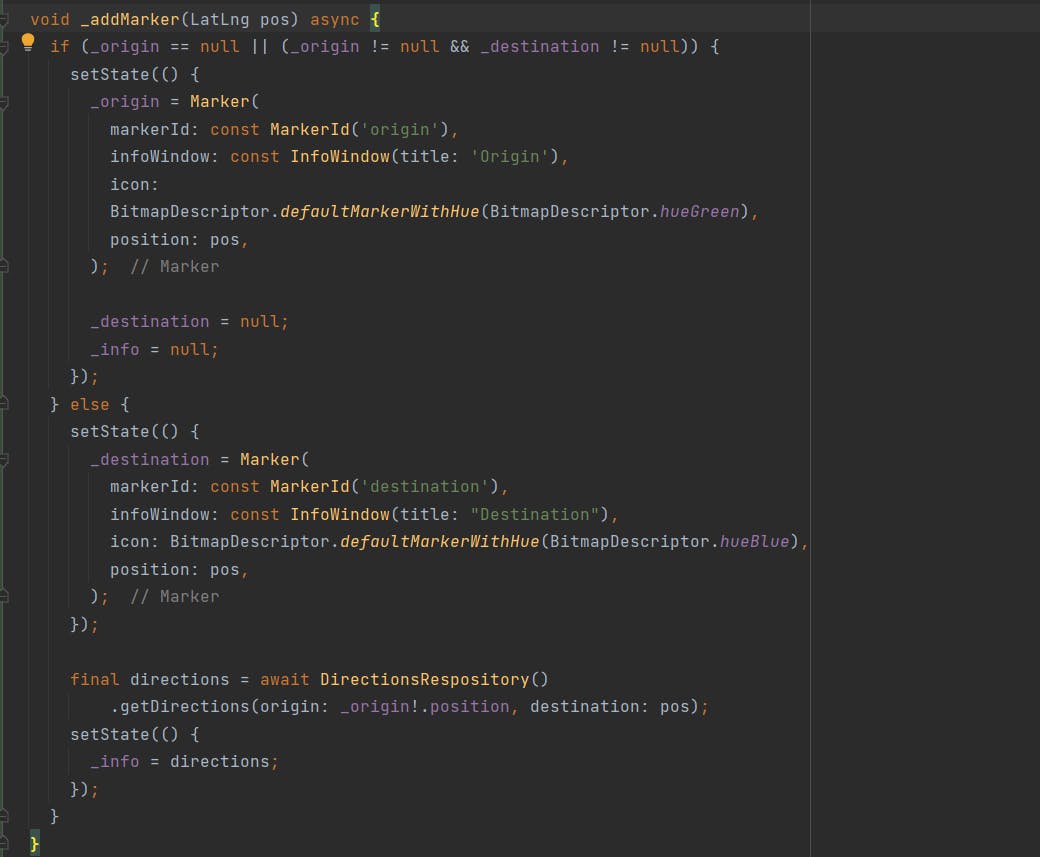
If the origin is not set or both the origin and destination are set, we then set the Origin marker. Origin is set in the if block, we set the Destination marker in the else block. We called setState to update our UI and instantiate Origin marker. Hence, we set a unique marker id, infoWindow to Blue. We then reset destination. Similar to the Origin marker, we set specify properties for Destination marker.
- Fetched information about the route using Directions API
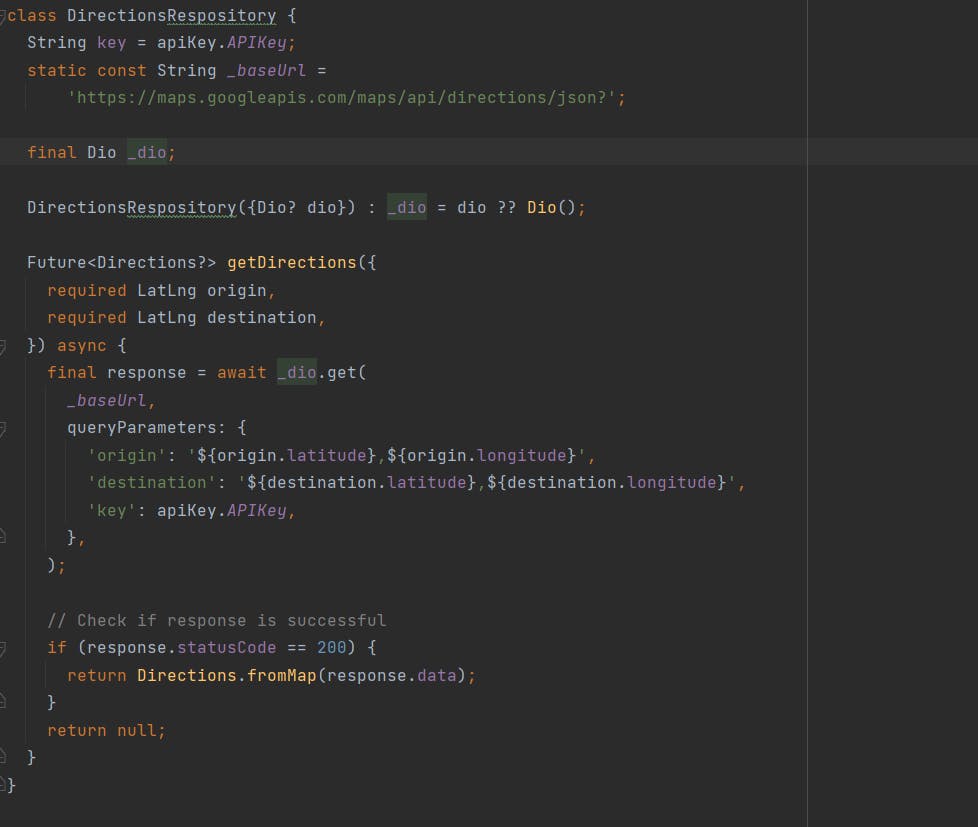
We created a
DirectionsRepository class, we also added the
baseUrl.
To get certain parameters we used a
GET request, we then passed in Origin and Destination coordinates and our Google API key defined a separate file
key.dart . We checked if response is successful using HTTP response status code 200 and returns a success message from the API
- We set up Directions Model to Parse JSON
A common use of JSON is to exchange data to/from server.
- Drew a Route
We used Polylines to draw route between the points.
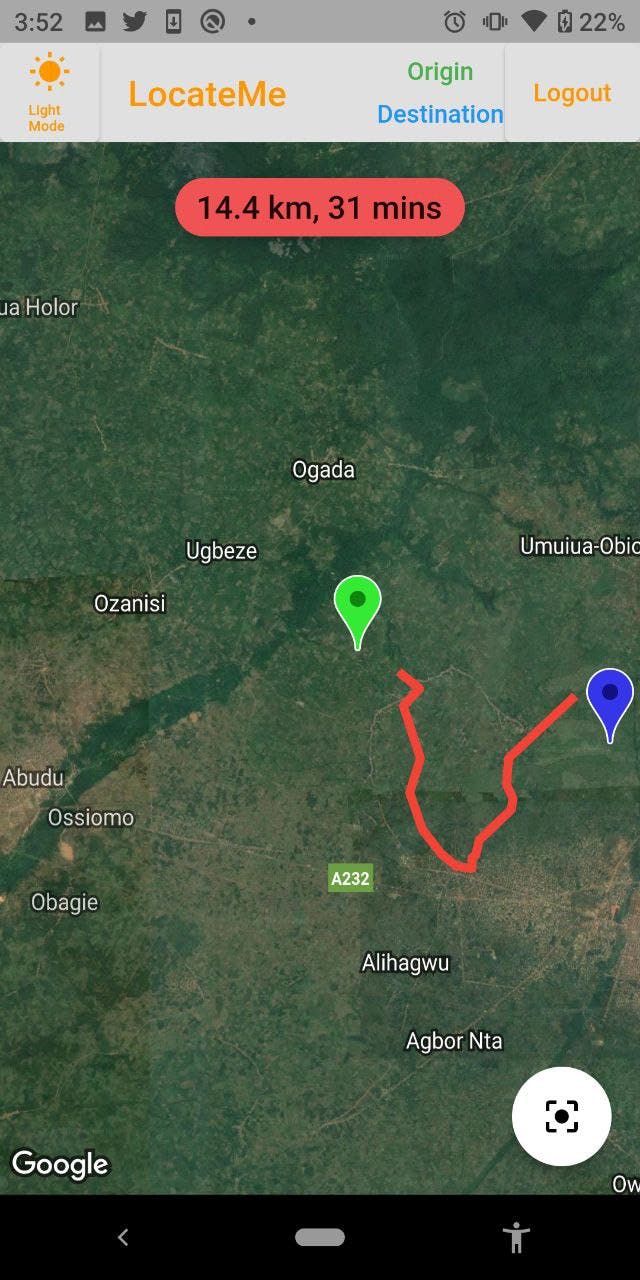
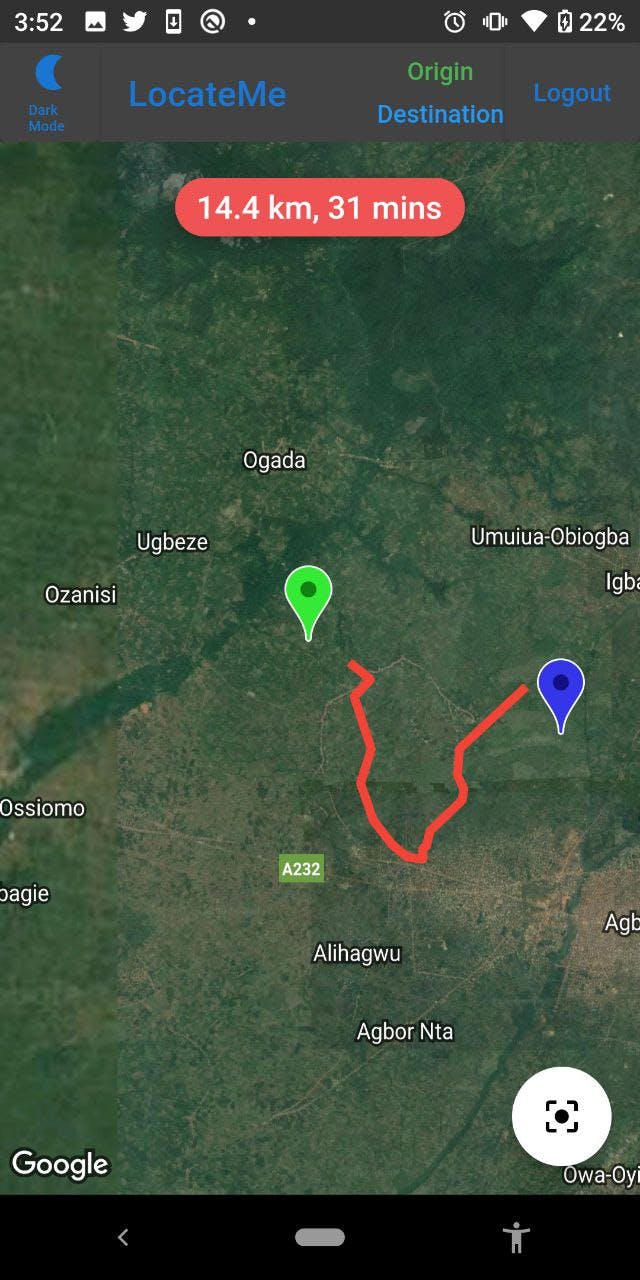
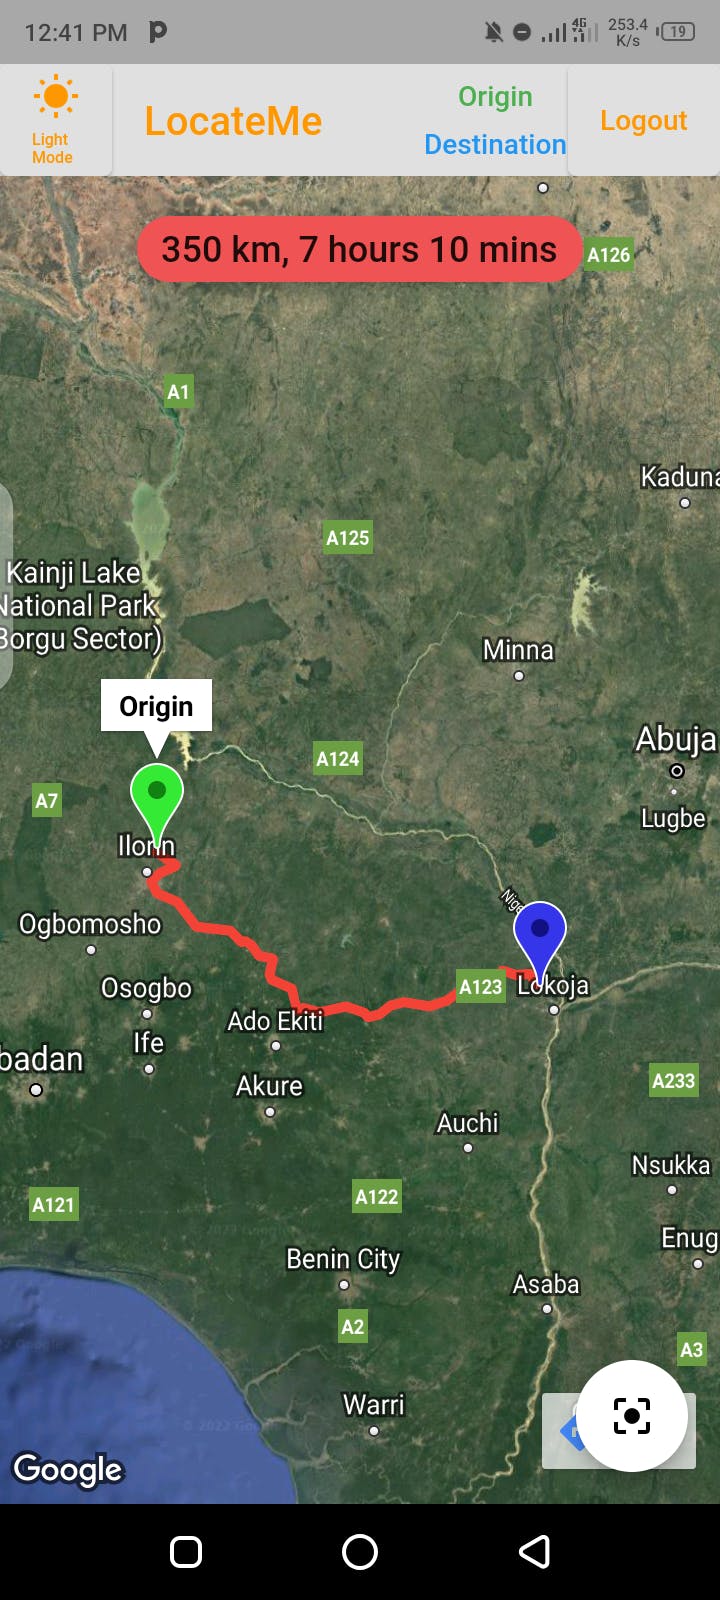
The Map Screen
The Map Screen in Light mode
The Map Screen in Dark mode
Phase 3: Closure, Operation and Efficiency
This application transitions from the Splash screen to the Authentication screen and finally to the Map screen. To calculate distance, the user will long press on their initial location and long press on the final location. The marker appears on both locations and a route line is seen. The application provides a zoom in and out feature, user can zoom in or out to select a specific location.
Conclusion
We hope this article helps you get started with Google Map APIs and other Open APIs.